
-
cPanel
-
- Mailing Lists
- Default Address
- Autoresponders
- Forwarders
- Email Accounts
- Spam Filters
- Track Delivery
- Global Email Filters
- Email Filters
- Address Importer
- Encryption
- Email Disk Usage
- Calendar Delegation
- BoxTrapper
- Configure Greylisting
- Email Routing
- Filter Incoming Emails by Domain
- Email Deliverability
- Authentication (SPF and DKIM)
- Show Remaining Articles (4) Collapse Articles
-
-
WHM
-
- SSH Password Authorization Tweak
- Apache mod_userdir Tweak
- SMTP Restrictions
- Compiler Access
- Configure Security Policies
- Password Strength Configuration
- cPHulk Brute Force Protection
- Security Questions
- Manage External Authentications
- Two-Factor Authentication
- ModSecurity™ Vendors
- ModSecurity Configuration
- Manage root’s SSH Keys
- Manage Wheel Group Users
- Host Access Control
-
- Terminate Accounts
- Quota Modification
- Modify an Account
- Change Site’s IP Address
- Create a New Account
- Manage Account Suspension
- Upgrade/Downgrade an Account
- Limit Bandwidth Usage
- Force Password Change
- Email All Users
- Reset Account Bandwidth Limit
- Password Modification
- Skeleton Directory
- Rearrange an Account
- Raw Apache Log Download
- Modify/Upgrade Multiple Accounts
- Web Template Editor
- Unsuspend Bandwidth Exceeders
- Show Remaining Articles (3) Collapse Articles
-
- Articles coming soon
-
- Articles coming soon
User Manager
- Log in to your cPanel>>Preferences section >> user manager
Step 1 − Open User manager by clicking the last icon in the sidebar on the left side. Once user manager is open, you will see an interface like this
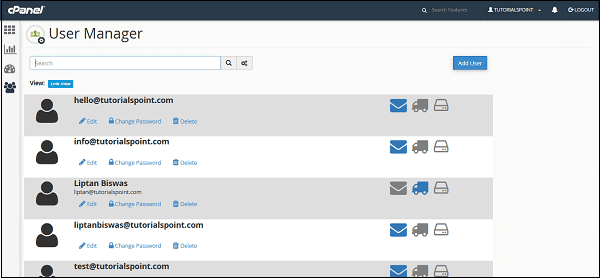 Step 2 − You can view all the accounts of your cPanel here, which includes your system accounts too. Account having the Inbox icon colored shows that the account has an email address. The accounts having the truck icon colored show that the account has an access to FTP account, whereas the accounts having the disk icon colored shows that the account has access to a webdisk.
Step 3 − Find the account you wish to delete and click on the delete link under the domain.
 Step 4 − You will be asked for confirmation, click on the delete button to delete the user account.
To Edit an Account
If you wish to edit an account or to change the password of any account. Follow these steps −
Step 1 − Choose the account you wish to edit or change password of, from the user manager. Click on Edit link or Change Password link under that account. Both of these will take you to the same interface, where you can edit the account.
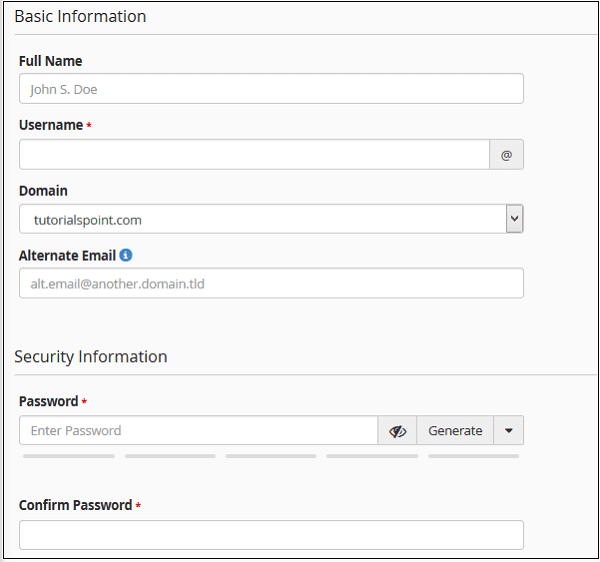
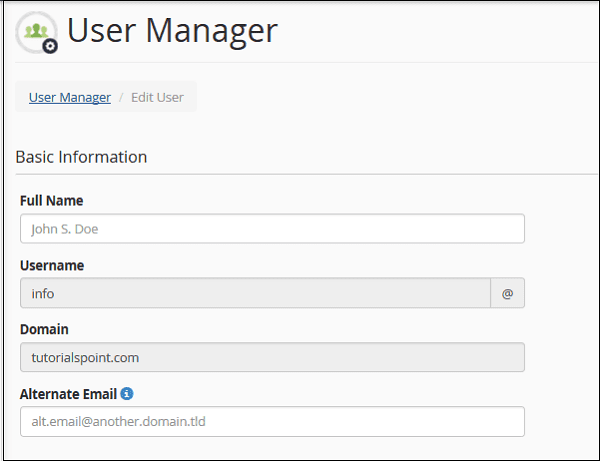 Step 2 − You can specify the Full name of the user. Or else, you can provide alternate email id for that account.
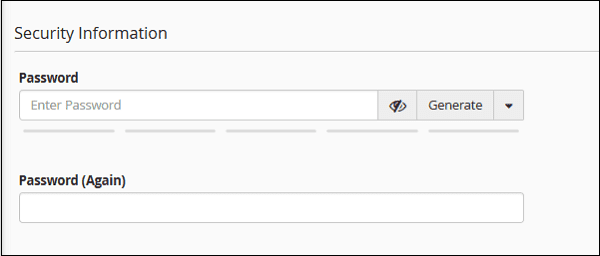
Step 3 − Scroll down to see the Security Information, you can provide a new password in this interface or whether, you wish to change the password, if not leave it blank.
 Step 4 − Choose the services you want to enable for that user account from the services interface.
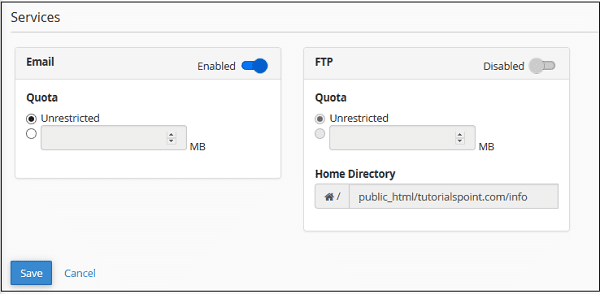 You can enable or disable email, also you can change the Quota for the email of that account. You can also enable FTP for that account, just move the switch to enable the FTP account.
Step 5 − Click Save for saving the settings for that existing user.
Add a New User
You can also add a new user and give him access to email and FTP. To create a new user, follow these steps −
- − Click ‘Add User’ Button found on the right side of the user manager interface. And you will see the same screen, which you saw on the Edit user interface.
 Provide all necessary information like username and password, you can also provide full name of the user, but it is optional.
- Choose services you want to give to that particular user. Enable the services by moving the switch to enable or disable the services.
- Click the Create button to create the user and return to the user manager interface or click Create and Add Another to create the user and return to Add user interface to add a new user again.
 Provide all necessary information like username and password, you can also provide full name of the user, but it is optional.
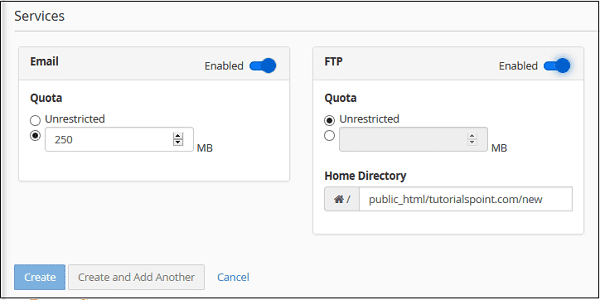 Click the Create button to create the user and return to the user manager interface or click Create and Add Another to create the user and return to Add user interface to add a new user again.