
How Can We Help?
-
cPanel
-
- Mailing Lists
- Default Address
- Autoresponders
- Forwarders
- Email Accounts
- Spam Filters
- Track Delivery
- Global Email Filters
- Email Filters
- Address Importer
- Encryption
- Email Disk Usage
- Calendar Delegation
- BoxTrapper
- Configure Greylisting
- Email Routing
- Filter Incoming Emails by Domain
- Email Deliverability
- Authentication (SPF and DKIM)
- Show Remaining Articles (4) Collapse Articles
-
-
WHM
-
- SSH Password Authorization Tweak
- Apache mod_userdir Tweak
- SMTP Restrictions
- Compiler Access
- Configure Security Policies
- Password Strength Configuration
- cPHulk Brute Force Protection
- Security Questions
- Manage External Authentications
- Two-Factor Authentication
- ModSecurity™ Vendors
- ModSecurity Configuration
- Manage root’s SSH Keys
- Manage Wheel Group Users
- Host Access Control
-
- Terminate Accounts
- Quota Modification
- Modify an Account
- Change Site’s IP Address
- Create a New Account
- Manage Account Suspension
- Upgrade/Downgrade an Account
- Limit Bandwidth Usage
- Force Password Change
- Email All Users
- Reset Account Bandwidth Limit
- Password Modification
- Skeleton Directory
- Rearrange an Account
- Raw Apache Log Download
- Modify/Upgrade Multiple Accounts
- Web Template Editor
- Unsuspend Bandwidth Exceeders
- Show Remaining Articles (3) Collapse Articles
-
- Articles coming soon
-
- Articles coming soon
< All Topics
Print
cPanel Web Services Configuration
Posted
- Log in to your whm>> Service Configuration>>cPanel Web Services Configuration
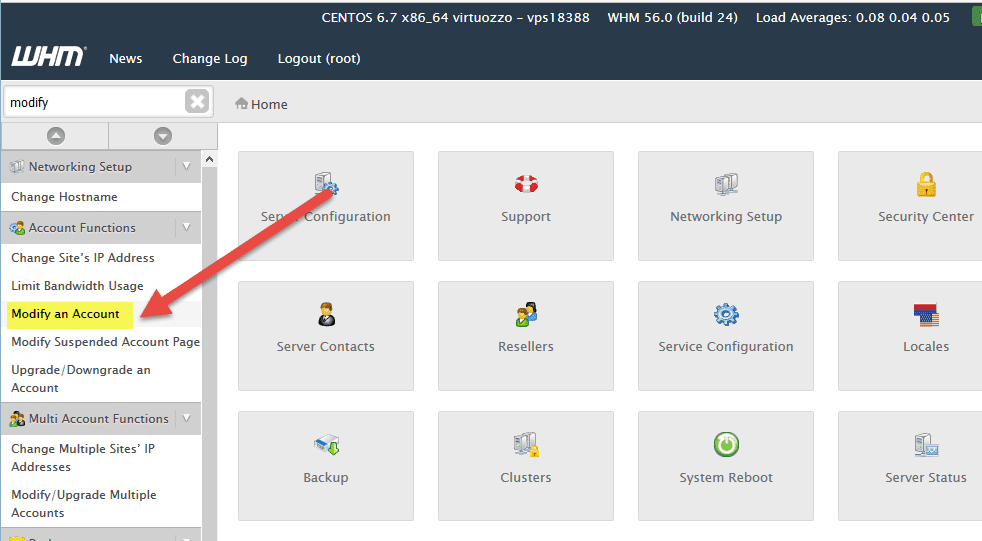
- In the search bar in the top left corner of WHM, type in “Modify an Account.” Click on the menu item when it appears in order to launch it.

- If you have any user accounts already created, then you will see them listed here. Once you have selected the user or domain, then click on Modify.

- The first section is titled Basic Information. Each section will be listed in a table below and a graphic will show how it appears within WHM. Click on an item in order to modify it.

| Primary domain | Primary domain used to create the cPanel account |
| Username | Username assigned to the cPanel account |
| Account Owner | Name of the Account Owner |
| Contact Email | Contact email for the account owner |
| Default Locale | Determines the language used in cPanel |
| cPanel Theme | Theme for the cPanel appearance |
After the Basic Information, you will see Resource Limits
| Package | Name of the package used to create the cPanel account |
| Disk Quota (MB) | Hard drive quota assigned to the account |
| Monthly Bandwidth Limit (MB) | Bandwidth limit (by month) assigned to the account |
| Email Accounts | Maximum number of email accounts |
| FTP Accounts | Maximum number of FTP accounts |
| Mailing Lists | Maximum number of mailing lists |
| SQL Databases | Maximum number of databases |
| Subdomains | Maximum number of Subdomains |
| Parked Domains | Maximum number of Parked domains |
| Addon domains | Maximum number of Addon domains |
| Maximum Hourly Email by Domain Relayed | Maximum number emails relayed per hour |
| Maximum percentage of failed or deferred messages | A domain may send per hour Maximum number of failed email message |
The next section is called Privileges
| Reseller | Privileges Allows Reseller privileges |
| CGI Privileges | Allows CGI privileges |
| Shell Access | Allows Shell access |
The last section allows you to modify the DNS settings for email. You can set the DKIM and SPF settings to combat spam.
| Enable DKIM on this account | Allows you to enable DKIM settings for email accounts |
| Enable SPF on this account | Allows you to enable SPF settings for email accounts |
- One you have finished modifying these settings, click on the blue Save button at the bottom of the page in order to save any change.