
Service Manager
login to >>whm >>Service configuration >>Service Manager
Accessing the Service Manager feature in WHM
First, you need to log into the WHM service for your VPS or Dedicated Server. If you are not sure how to do that, please check our How to access the WHM service tutorial. After you have logged in, please use the search bar on the left side of the page and type “Service Manager”.
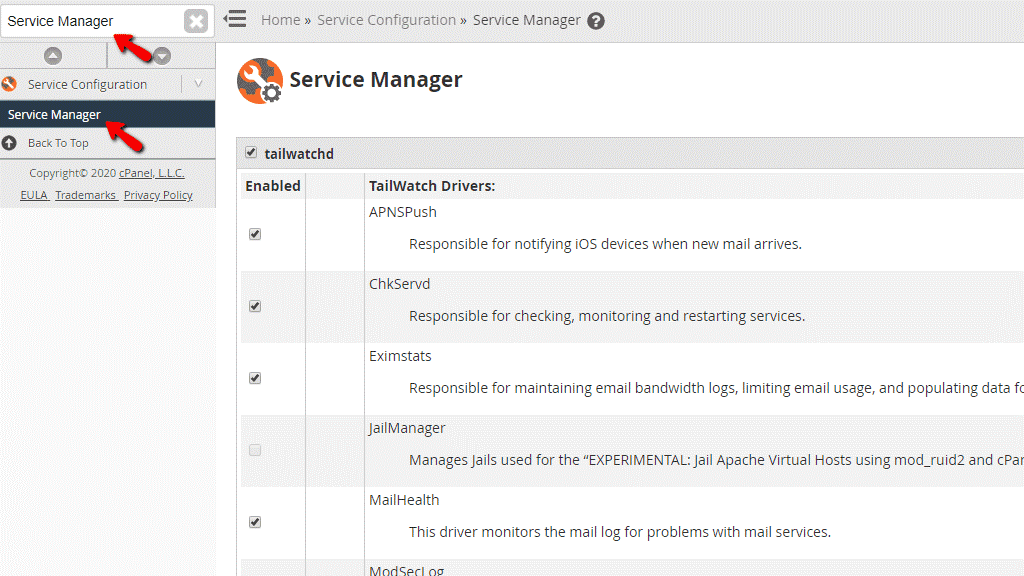
When the functionality shows up below the search bar, please click on it so you can be sent to the “Service Manager” page.
Changing the services you want to monitor
When you land on the page, you will notice two table sections. The first one enables or disables the various drivers of the “tailwatchd” daemon. In short, what this daemon does is monitors certain log files, and based on the output from them, it takes action. An example of that would be if it detects your IMAP service as not responding, it will attempt to restart it and get it back running to ensure that you do not miss any important emails.
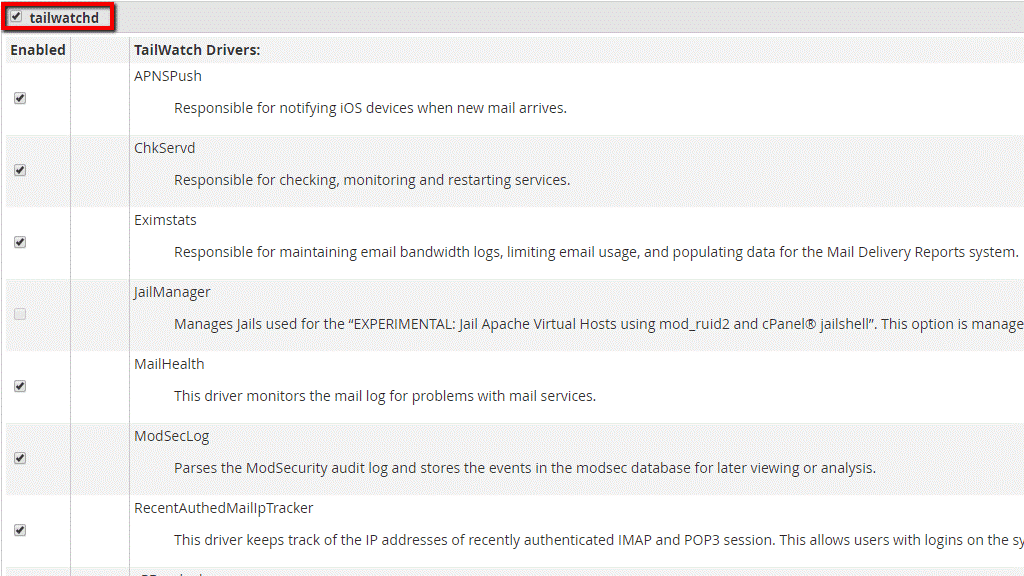
Let’s go over all these drivers and explain what they do.
- APNSPush – This driver is responsible for notifying iOS-based devices when a new mail is received.
- ChkServd – This driver looks after the various running services (exim, httpd, crond) and will restart them if they go down.
- Eximstats – This driver will maintain email bandwidth logs, limit email usage and populate data for the Mail Delivery Report system.
- MailHealth – This driver will be on the lookout for problems concerning the mail services on your server.
- ModSecLog – This will look over the ModSecurity audit log and will store events in the ModSec database so you may analyze it later if needed.
- RecentAuthedMailIpTracker – Keeps track of the IP addresses that recently authenticated using IMAP or POP3. This would allow users to bypass delays and greylist checks.
- cPBandwd – When enabled, this will be generating bandwidth logs for the IMAP and POP3 services.
All of these will be enabled by default when the server is set up and we highly recommend keeping them all as such. However, if you would like to disable any of them, please click on the checkbox located on the first column of the table section and make sure it corresponds to the row where the service is.
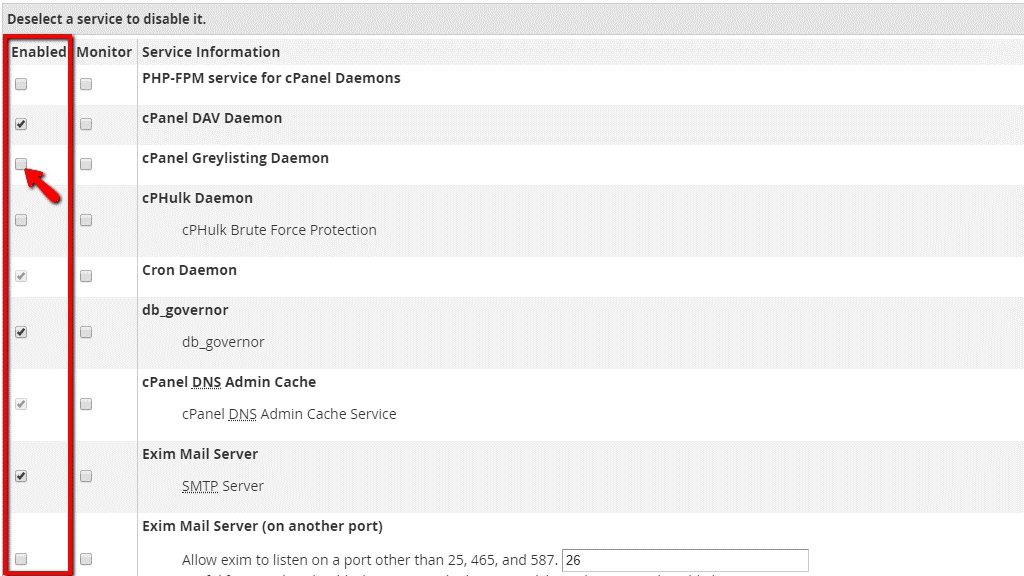
When you scroll down, the second section you will see is the service daemon table section. Through it, you can enable certain services and add them for monitoring and vice versa. In order to enable or disable a service, please select or respectfully deselect the checkbox which is located in the first “Enabled” column, and make sure it corresponds to the row of the service you want to alter.
If you want to enable a certain service for monitoring, use the checkbox under the second column called “Monitoring” that corresponds to the row the service is in.
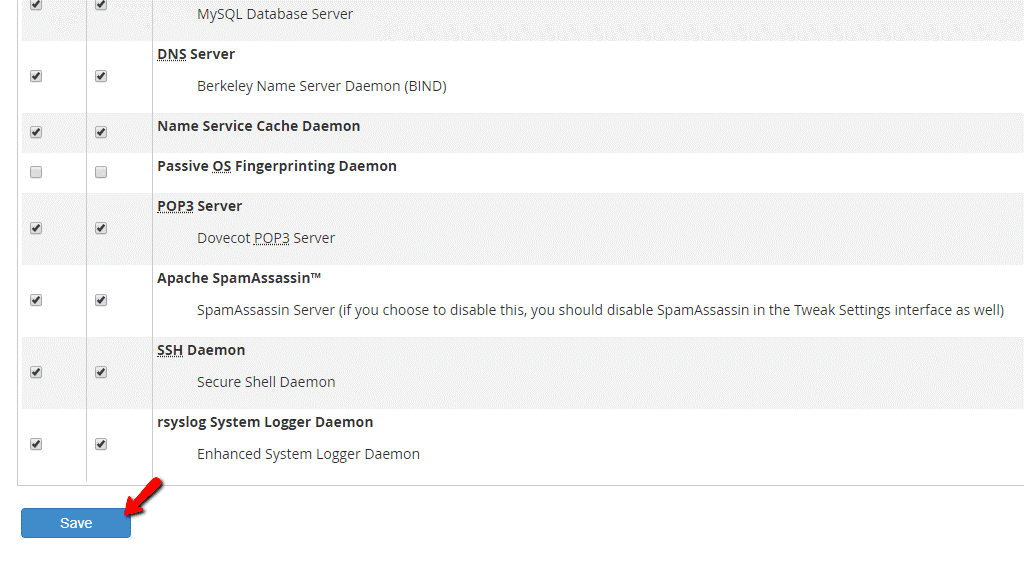
When you have made the desired changes on this page, in order to apply them, please click on the “Save” button, located on the bottom of the page.
There you have it! The “Service Manager” feature in the WHM control panel explained in its entirety. We hope that we were able to give you insight into how it works and how you can alter the services that are available on your server. If you have any questions regarding this functionality, please, do not hesitate to contact our Technical Team from your Client Area by submitting a ticket.