
Spam Filters
Log in to your cPanel>> Mail section >> Email spam
Enabling and Disabling the Spam Filters in cPanel
Step 1: Log in to your cPanel. There are a lot of ways to do this, but the sure-fire easiest way is to log in to your client area and then open your cPanel.

Step 2: Scroll down in your cPanel and look for the Email Section. Once you’ve located that, click the Spam Filters option to open the Spam Filters utility.

Step 3: Once the Spam Filters utility is open, you’ll have a few options.

Pro-Tip
These settings are global and apply to all mailboxes under your cPanel account.
Let’s review these options.
Process New Emails and Mark them as Spam

The first option, Process New Emails and Mark them as spam is a global setting that allows you to enable or disable Spam Filtering. If you are a brave person and choose to manage this on your own, you have the option to disable this for your account. Otherwise, by default, any message that exceeds the Spam Threshold Score of 5 will be marked as Spam.
Adjusting the Spam Threshold Score
If you would like to change the Spam Threshold Score, you can do so by clicking the option, and on the Adjust Spam Threshold Score page, you can use the drop-down menu to select a different score level.

If you do change the Threshold Score, be sure to click the blue Update Scoring Options button to save your changes!
Move New Spam to a Separate Folder (Spam Box)
The option beneath the first option, Move New Spam to a Separate Folder (Spam Box), is the setting which when enabled will move e-mail detected as spam to a dedicated folder in the e-mail account called Spam.
Configuring the Spam Box Settings
By clicking Configure Spam Box settings, there are several options you can use:
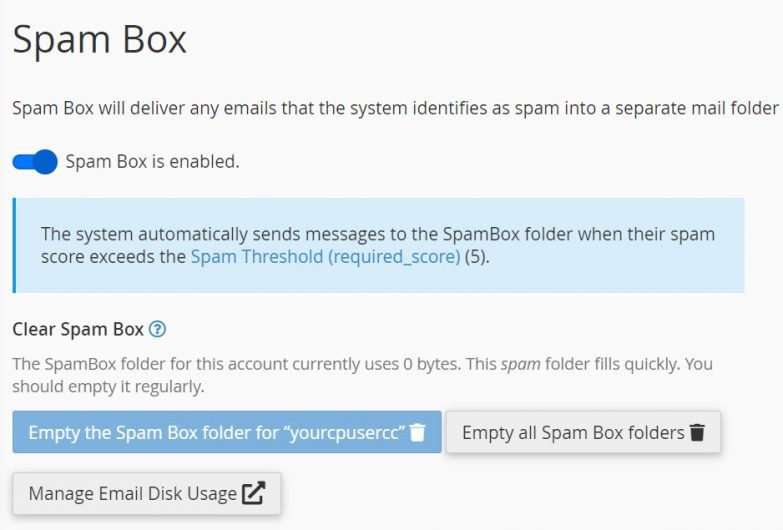
The first option with the blue button, Empty the Spam Box folder, will empty the Spam Box folder for the cPanel user’s default mail account. This can sometimes be helpful if you find the account rapidly filling with spam.
You also have the option to Empty all Spam Box Folders if you have users on your account who refuse to empty their junk mail and it’s consuming all of their account space. You can make that choice for them.
You also have the option to jump into the Manage Email Disk Usage utility.
Automatically Delete New Spam (Auto-Delete)
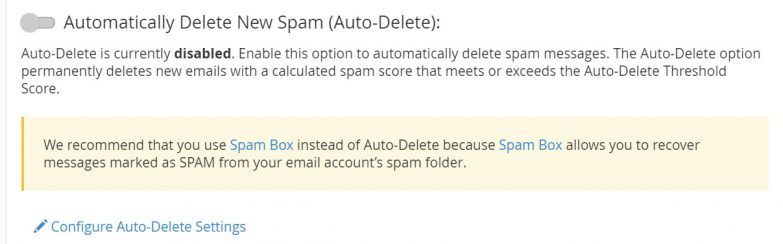
The Automatically Delete New Spam option can be useful in the right circumstance. For example, if you own a domain that is just hammered with spam email no matter what you do, you can have this setting save you from having to empty your spam boxes.
Configuring the Auto-Delete Settings
If you open the Configure Auto-Delete Settings link, you will have another way to enable or disable the option.
Additional Configurations (For Advanced Users)
There are 3 additional options that can be used:

Let’s explore these settings.
Whitelist
The whitelist function allows you to whitelist either a specific email address or all mail from a specific domain name. This means any email sent to your domain from that email address or domain, depending on your setup will bypass the spam filter and be delivered to the inbox.
This is super useful if you find that you subscribe to a newsletter that is frequently flagged as spam, even if you’ve tried to train the Spam Filter not to mark it as spam. Or if you have users who must ensure that any message sent from any account at a specific domain must be delivered to the inbox. This can happen if you have automation that relies on email message delivery for triggering.
Configuring Whitelist Settings

Clicking Edit Spam Whitelist Settings will open the Whitelist utility where you can add a new whitelist from items.
To do this, just click the blue link, Add A New whitelist_from Item.
Here, you would specify the email addresses that the system should not tag as spam.
Pro Tips:
Do not whitelist your own domain (for example, “*@example.com”) because if you do, spammers who impersonate your domains may be more effective.
You can also use the “*” and “?” wildcard characters for more flexibility.
Blacklist
The blacklist function will mark any messages sent from a domain or email address on the Blacklist as spam. This can be useful if a particular email address or domain name is consistently spamming you.
Configuring Blacklist Settings

Clicking Edit Spam Blacklist Settings will open up the Blacklist Utility where you can add new email addresses or domains to block.
Pro Tip:
Specify the email addresses to tag as spam. You can also use the “*” and “?” wildcard characters for more flexibility.
Calculated Spam Score Settings

Apache SpamAssassin uses hundreds of tests, and you can assign scores to individual tests to configure Apache SpamAssassin for your server. Use this interface to modify the individual test scores that Apache SpamAssassin uses to mark a message as spam. You can increase the score of a test that incorrectly allows spam messages to pass through. Conversely, you can disable or reduce the score of a test that falsely marks messages as spam. For example, you can disable tests that mark bankruptcy emails as spam for a user who is a bankruptcy lawyer.
To update a score, select a new score from the drop-down menu list of scores, and enter a value that contains up to 3 decimal places.
Set the score to 0 to disable the test.
When you’ve finished, be sure to click the blue Update Scoring Options button to save your changes.
For more information on the various tests, click here to open the Documentation on Spam Scores